Greetings!
Happy first day of June 2026! Wow, it is so hard to believe that over five months have passed so far this year! I’m still thinking about my to-do list from January! Ouch!
In today’s blog I want to address my backup philosophy and process as well as show off a fun topic converting a photo to “painterly.”
My Backup Philosophy and Process
Staying on top of your backup processes is critically important to ensure you do not lose any of your photos, especially the most important ones. There are a variety of philosophies on this topic within the photography collective. Let me tell you about the process I follow.
SD Cards
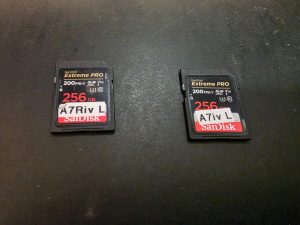
First, we begin with the photos on the SD Card inside my camera (or cell phone memory). Until I’ve backed up these photos, I take exceptional care that these cards are not lost or corrupted.
Second, process my SD Cards using Adobe Lightroom Classic (aka LrC). The photos are copied onto my primary photo drive which is an external spinning disk. Its name is Q:/Photos 2026+.
SyncBackFree
After I’ve processed the photos on LrC I need to ensure the photos on other Q:/ drive are also backed up. Here I use a tool called SyncBackFree (now on V12). I use the free version, but a paid version is also available.
SyncBackFree v12 is configured to back up my Q:/ drive to my R:/Photos 2026+ daily around noon.
Backblaze
My photos are still inside my house on my SD card, Q:/ drive, and R:/ drive. But what about offsite? Here I use a subscription service called Backblaze. I’ve been using Backblaze for several years now. I purchase the personal backup for around $9 US a month. Automatic backups for computers and external drives are included for one person including unlimited backups, file size, and speed.
My Backblaze backup schedule is set for “Continuous.” My files are readily retrievable from the Backblaze cloud for free or you have an option for your backed up files to be shipped to you on an external hard drive.
Unfortunately, I’ve had a few instances where I’ve needed to retrieve backed up files from Backblaze due to a failed hard drive (both spinning disk and solid-state drive). In both instances, I was able to recover the necessary files to restore on my repaired machine.
I highly recommend Backblaze!
You can learn more about Backblaze at: https://backblaze.com/cloud-backup/personal
SD Card Backups
Remember those SD cards I mentioned above, well, they still have photos and videos on them. In order to offer some added protection for these files I manually move the files on the SD cards to another external drive (S://Photo SD Card) that is also backed up by Backblaze.
Once this is done, I then format the SD cards for continued use in my cameras.
Here’s a flow chart showing my backup flow:

Is this Overkill?
I don’t think this is overkill since I use my photos for photojournalism and print sales. Hence, these photos have value along with my personal photos I want to save for the future. So, in sum and substance, that is my backup process that I’ve been following for several years and except for failed drive issues on two occasions, I’ve not lost any photo files. (I hope I didn’t jinx myself!! 😱)
A Fun Way to Make a Painterly Photo
Occasionally I will take one of my photos and turn it into a “painterly” format where the photo is converted to look like an oil painting, watercolor, pastel, pen and ink sketch, etc. There are some commercial programs available to make these new pictures; however, they can be quite expensive, have limited capabilities, or are slow to build exactly what you want.
That is until I started to use Google’s Nano Banana 2.
You can access Google’s Nano Banana 2 image generation model easily, either directly through Gemini or via specialized developer and creative platforms.
One of the most popular ways to access it is to log in to Gemini, set your mode to “Fast,” and select “Create Image” (or click the banana icon) to start generating.
Alternatively, you can access Nano Banana 2 via alternative platforms.
I use the Gemini approach.
So, here is a recent example where I converted one of my photos to an “oil painting” painterly view.
The original photo was:

Figure 1 Anacortes Downtown Arch at Sunset
I attached this photo to Gemini/Nano Banana 2. I then gave it the following prompt:
Please make the attached photo into a painterly perspective – oil paint
And the following photo was produced:

Figure 2 Anacortes Downtown Arch – Oil Paint (AI Version)
Overall, I was simply “gob smacked” as my British friends would say! Wow, this is such an amazing capability to make painterly views from a photo.
Try it yourself and you will be amazed! 😳
How Can I Help You?
Thanks for reading this week! Please be sure to reach out to me at enhayden1321@gmail.com or post a comment in this blog to let me know if there are any topics you would like me to address in future posts. It would be my honor to pass along my experience and knowledge and learn some innovative ideas from all of you!
Thanks for reading! Thanks for your time! We’ll see you next week!
Ernie
Email: enhayden1321@gmail.com | Website: https://risingmoonnw.com | Facebook: https://www.facebook.com/RisingMoonNW | Instagram: https://www.instagram.com/risingmoonnw/
### END ###








 Anacortes Downtown Alliance (DAA) team members install banners near the Anacortes Ferry entrance.